
Google Tag Manager is a powerful tool that allows you to run various HTML and javascript tracking and analytic tools on your website. The beauty of Google Tag Manager is that all your tracking tags can be controlled from one dashboard and the code on your site never needs to be adjusted.
To get started with GTM we suggest that you install your Google Analytics tracking with GTM. This guide is a quick and easy step by step process on how to get started with a simple Google Analytics tag in GTM.
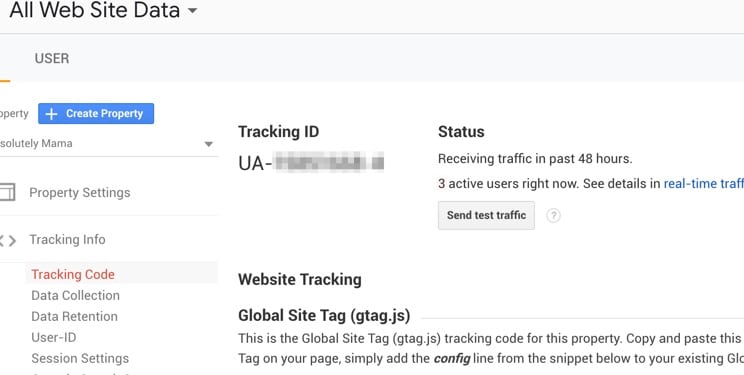
Step 1: Setup Google Analytics
This step won’t go into the details too much as I will assume you already have Analytics setup for your site. All you will need to do is get the tracking ID.
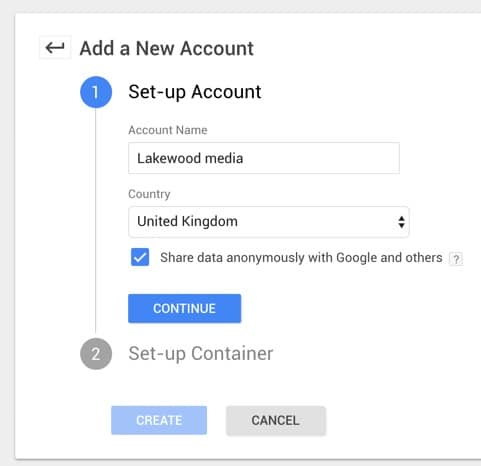
Step 2: Setup A Google Tag Manager Account
You can go to Google Tag Manager from Google Analytics or just go directly to tagmanager.google.com. You will need to create a tag account, each account can have multiple containers so we suggest that you structure this based on clients or companies. In this example, we will call our account ‘Lakewood media’ as we will include all our internal tags within this account.
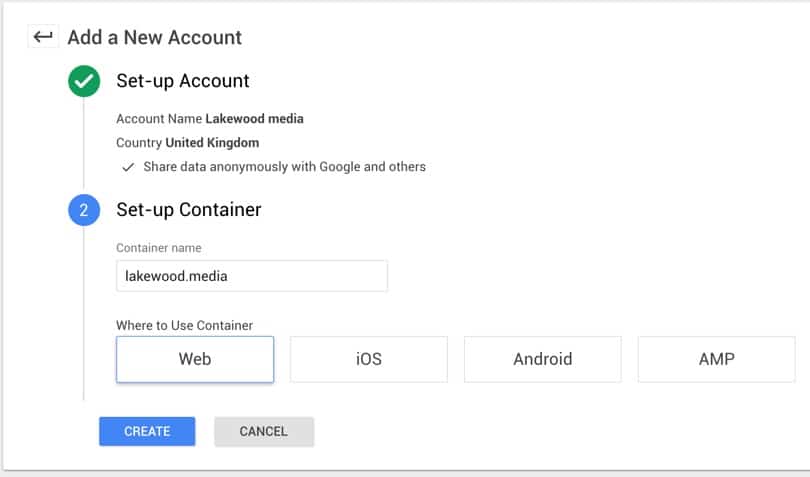
Click continue and then we can give the container details. Enter your website URL and also select ‘Web’.
Step 3: Setup Tracking Code
To make things easier and also give you analytics data on your WordPress dashboard we will be using the Google Analytics Dashboard plugin to add our GTM tracking code. Install the Google Analytics Dashboard for WP plugin.
Once installed and activated you will need to authorise the plugin to communicate with Google. Follow the steps provided by the plugin to complete this authentication.
Once authenticated click on ‘Tracking Code’ under the ‘Google Analytics’ menu on WordPress.
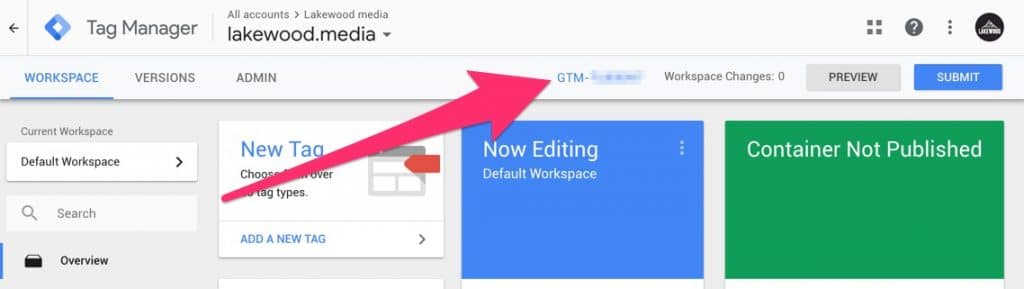
Under tracking type select ‘Tag Manager’. Now you will need to go back to Google Tag Manager and get the web container ID. Your web container ID is located at next to the preview button and begins with GTM- copy this and paste into the plugin settings. Leave tracking placement and HTML head.
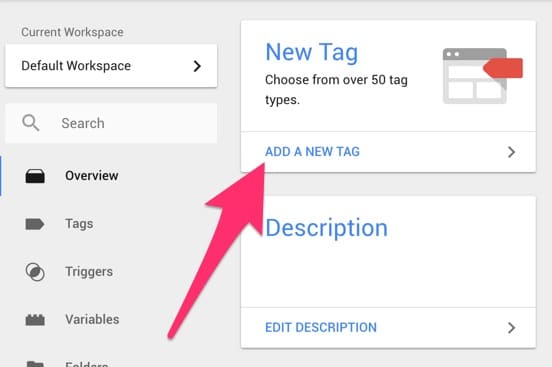
Step 4: Setup A Tag
Now we can create a tag for Google Analytics. Go back to Google Tag Manager and click on ‘Add a new tag’.
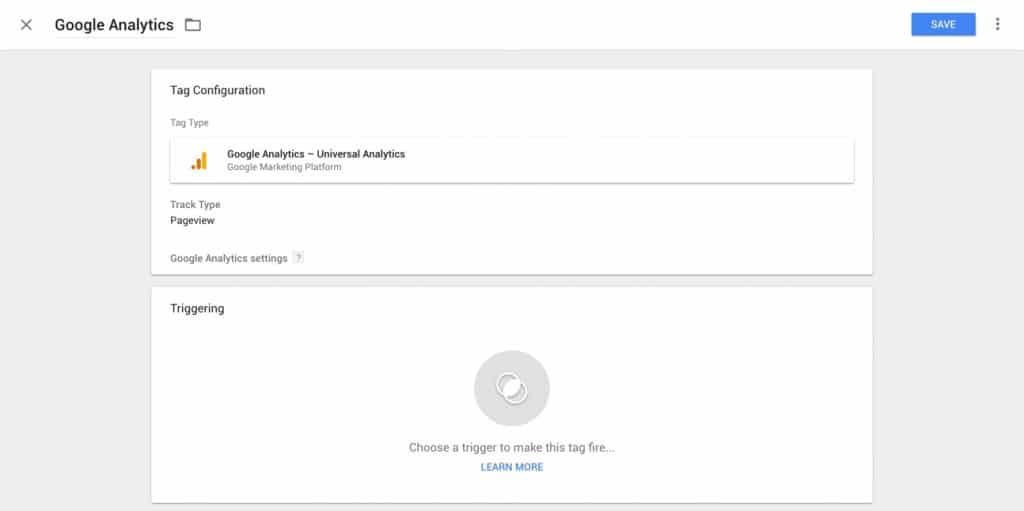
A settings panel will side out where you can begin to create your tag. First give your tag a name, ‘Google Analytics’ is an appropriate name for our tag. Now click on tag configuration and select ‘Google Analytics – Universal Analytics’. Leave track type as ‘Page View’.
Now click the ‘Google Analytics’ drop down and select ‘New Variable’
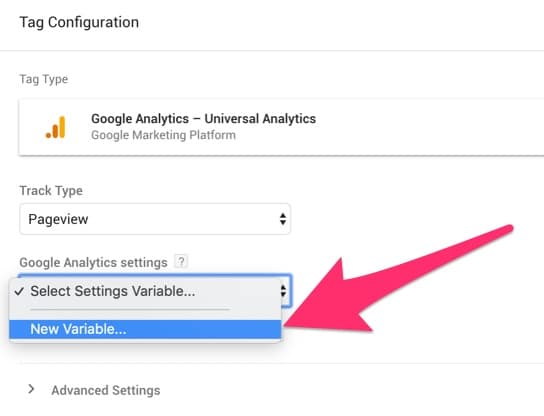
A new settings panel will side in. You will now need to get your Google Analytics tracking ID from step 1. This will begin with UA-, copy and paste your tracking ID into the tracking ID field. Also, give the variable a name such as ‘Tracking ID’. Click save.

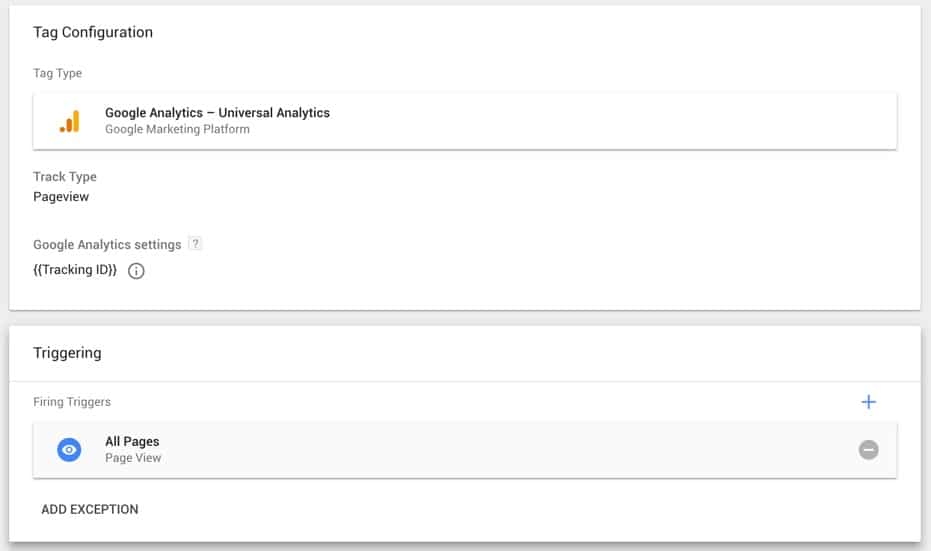
Now click on ‘Triggering’, simply select all pages and then save. Your tag should look like the screenshot below.
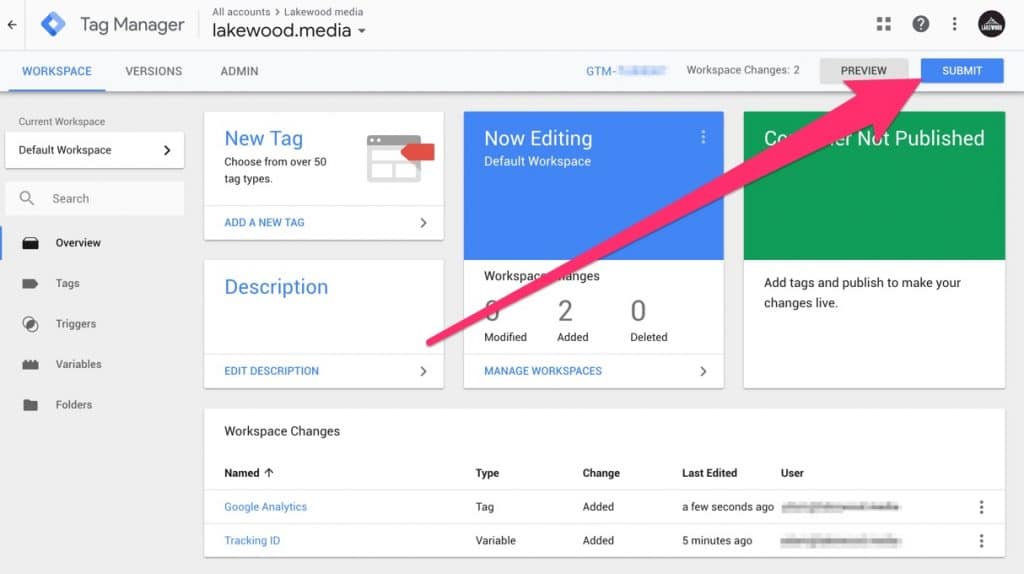
Step 5: Submit & Publish Your Changes
Before your tags will work you will need to submit the changes to your tag container. Click the blue ‘Submit’ in the top
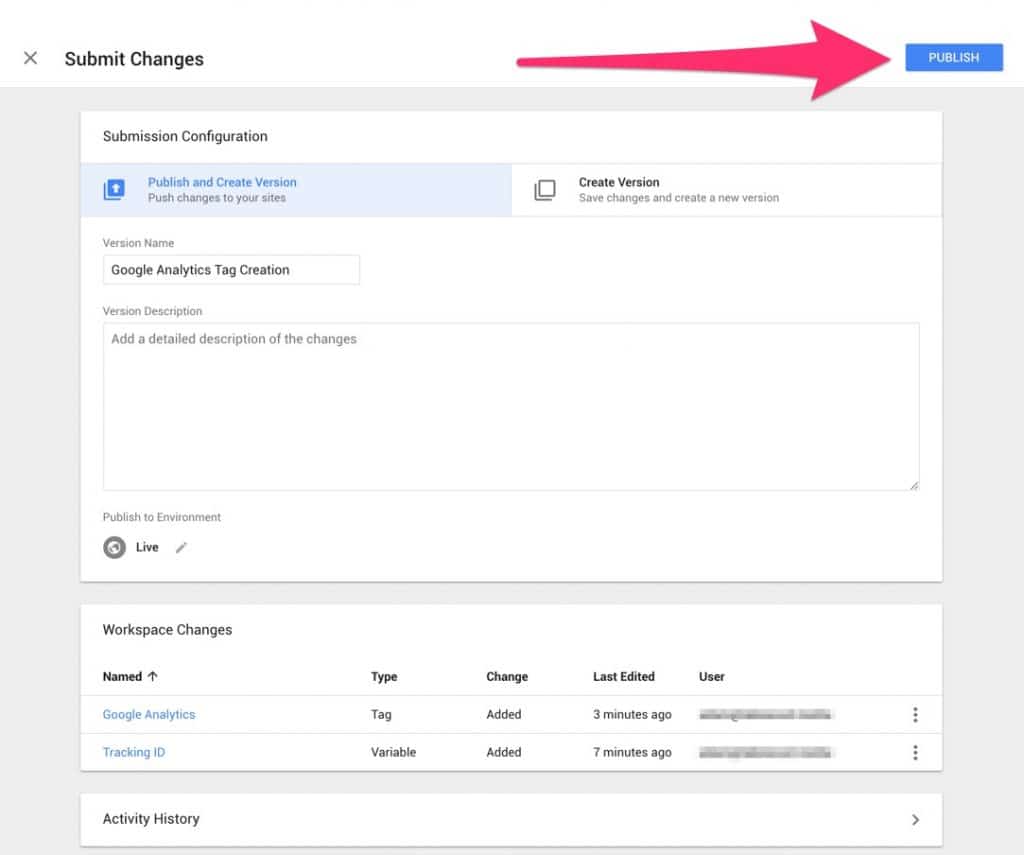
You can give your version a name, we called ours ‘Google Analytics Tag Creation’. You can also give your version a description, this is helpful if you are working with a large team who will be accessing and making changes to GTM.
Your analytics tracking will now be active and ready if you followed each step carefully. Go visit your site in a private/incognito tab and check the real-time tracking in Google Analytics.
For more tips on Google Tag Manager or if you need support with your site contact us or check out our WordPress support & maintenance service WP Helper.


